This model adapter will work for Mirror Drive Door G4s.
Before getting started, I would like to go over the potential drawbacks to using an ATX power supply in these systems.
ADC Power will be disabled. ADC Power is used to provide power to several Apple Cinema Displays. Since the adapted power supply will not be able to provide the 25v required for these displays, you won't be able to use them any longer.
Deep Sleep may not be reliable. Macs require a minimum of 5v during deep sleep, which is deliverable from an ATX power supply. Unfortunately, ATX power supply build quality varies greatly and not all power supplies are capable of supplying this power reliably when the machine switches into or out of deep sleep. If your power supply isn't capable of delivering reliable power, your system may not sleep, or it may experience freezes when waking up. In these cases, it is advised you consider a different power supply or preventing your system from going to sleep.
Using a Firewire Device while having an Apple ROM Maxtor Hard Drive installed in your tower may result in that drive ceasing to function. Details are sketchy on this, my own testing hasn't experienced any problems, but please be aware that this is a potential problem. This has not been reported on MDD systems yet, but since it was reported when using ATX Power Supplies with other G4s, the possibility exists.
Last Revision: June 16th, 2014
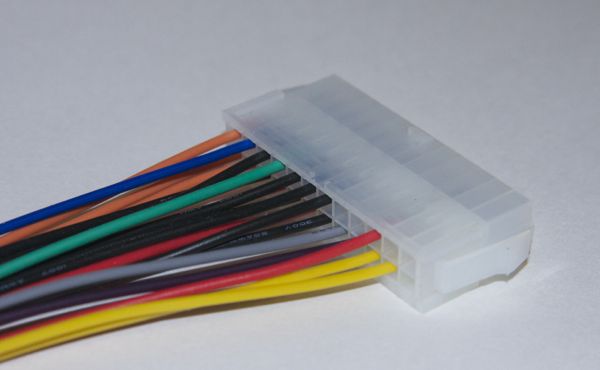
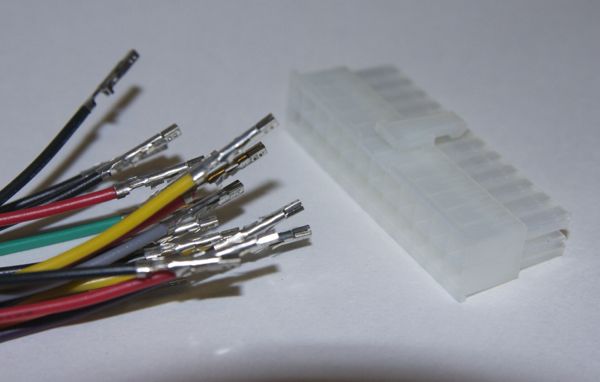
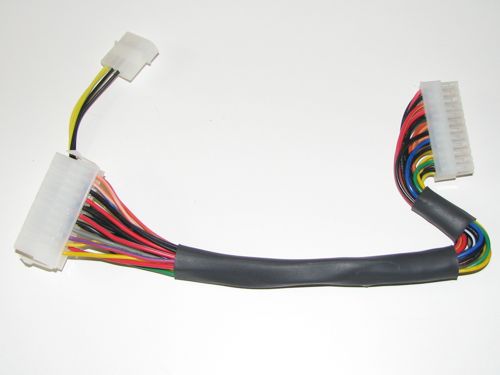
I use ATX 24-pin extension cables to begin my modification. Using a pre-made cable saves a bunch of time in not having to crimp individual wires. Unfortunately, it's still very time consuming to remove the wires in order to get the proper pin outs. You will want to get a Molex Extraction Tool to remove the pins as it is nearly impossible to build your own adapter without one.
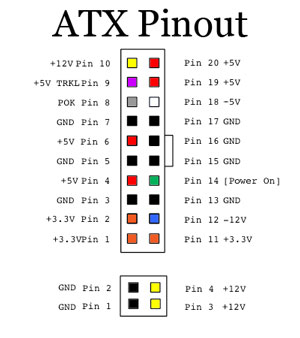
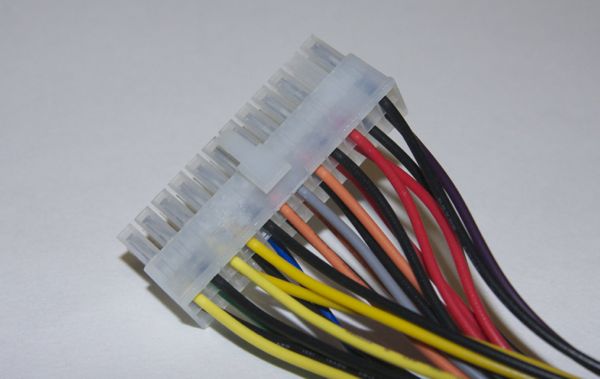
There are several wires on the ATX side that are unnecessary or in excess. Start by removing the -5v wire [white], two +5v wires [red], a ground [black], and a +3.3v [orange].
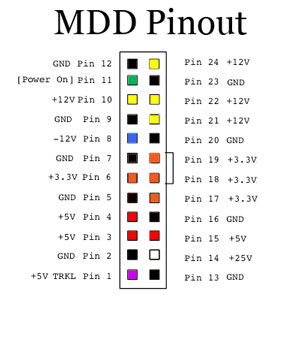
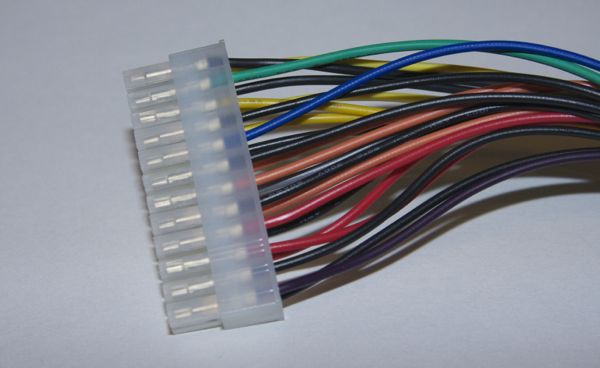
Nearly all of the wires in a MDD connector are different from ATX, so it's easiest to remove all of the wires from the motherboard connector and start fresh.
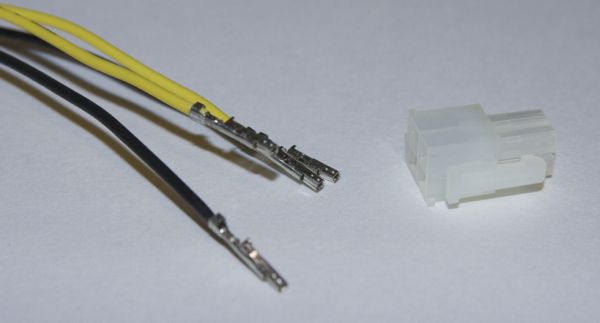
Since the MDD has four 12v pins [yellow], I use a HD to P4 adapter to provide the extra current. You'll need to remove the pins from the P4 connector.

If you decide to use HeatShrink, now is when you'll want to slip it over all the wires.
Start inserting each individual wire into the Motherboard connection. I generally start with the wires from the P4 first. Apple systems don't utilize the power ok (POK) line, but it is needed for an ATX power supply to function properly. I've found it best to connect the POK line to the 3.3v from the power supply. You can do this either via splicing/soldering, or you can just insert it into one of the 3.3v connections to the motherboard. I usually plug it in to pin 18.
With all the wires inserted, the only thing missing should be the +25v connection. In the MDD systems, this seems to only be used for ADC monitor power. As stated, the ATXG4 adapters DO NOT provide ADC power.
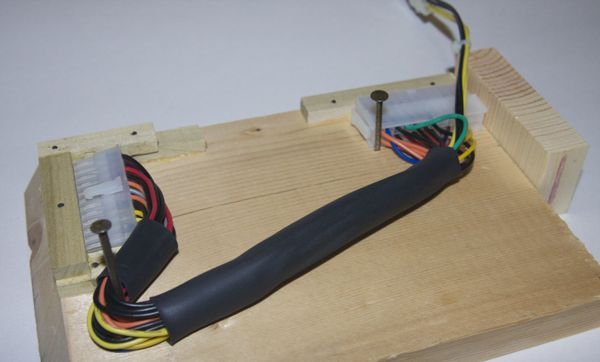
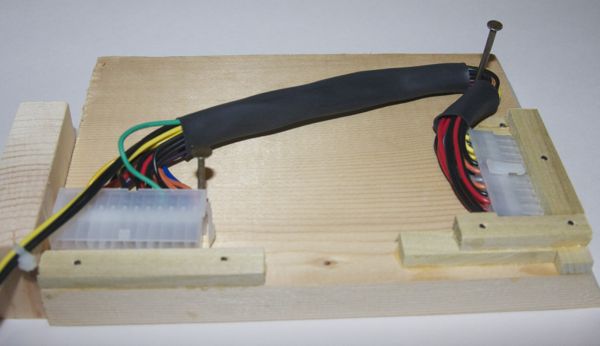
To help get the right "form" for my adapters, I've built a custom jig to use while applying heat to the Heatshrink.
This is how my Second Edition BETA MDD adapter looks when finished:
They have heatshrink to help protect the wires from the sharp edges in the MDD case and have been built to follow the contours of the case the same way the original power supply harness does. When installed, the ATX power connector runs just behind the main case fan, leaving plenty of room to connect almost any ATX power supply installed in the PCI bay area. I would encourage you to use a 24-pin ATX power supply with these adapters. For best results, use a power supply with only ONE 12v rail.
Warning:
The tricky part of MDD Adapters is installation. There are a lot of sharp metallic edges in a MDD case, especially near the connection to the motherboard, so you need to be VERY careful when installing. It is extremely easy for a wire to be cut, short out, and cause irreparable damage to the motherboard, CPU, or power supply.
Please, try to use the same wiring route as the stock power supply to avoid sharp edges and pinching the wires.
I have a limited supply of the 2nd Edition BETA adapters. These adapters are much more convenient to install as they follow the contours of the case the same way as the original power harness. These adapters have performed very well during testing, but they are still considered a 'BETA' product, meaning that there may be unexpected quirks that still need to be ironed out. Although I do try to do a thorough job in testing, it's impossible for me to text every conceivable hardware combination.
At the moment, there is no real guide for how to install an ATX Power Supply in a MDD G4. It is tricky as the original power supply is not a standard size. You'll likely want to position it above the optical bay. If you place the power supply here, you will need to raise it high enough for the video card to slide under it when the door is closed. You will also need to pay attention to where the AC power cord connects as it will need to be connected before closing the case.